Online help (WavRok!- Sound Recorder)
The archive file is compressed in zip format.
Please make a suitable folder, and place all files in the folder you created with the same folder structure.
File organization
| wavrok.exe | "WavRok!- Sound Recorder" Application file. |
|---|
Please delete each folder where the application exists.
Setting
| Device Setting |
Make various settings for the audio device for recording and playback. |
|---|---|
| Record Setting |
Make settings related to recording, such as the recording file storage folder. |
| Exit | Exit the application. |
Help
| Help Topics | Open the online help page. |
|---|---|
| Choose Language |
Select the display language of the application as "English" or "Japanese". |
| About WavRok |
Displays application version information.
|
| To Keep Using ... |
Enter the license key. |
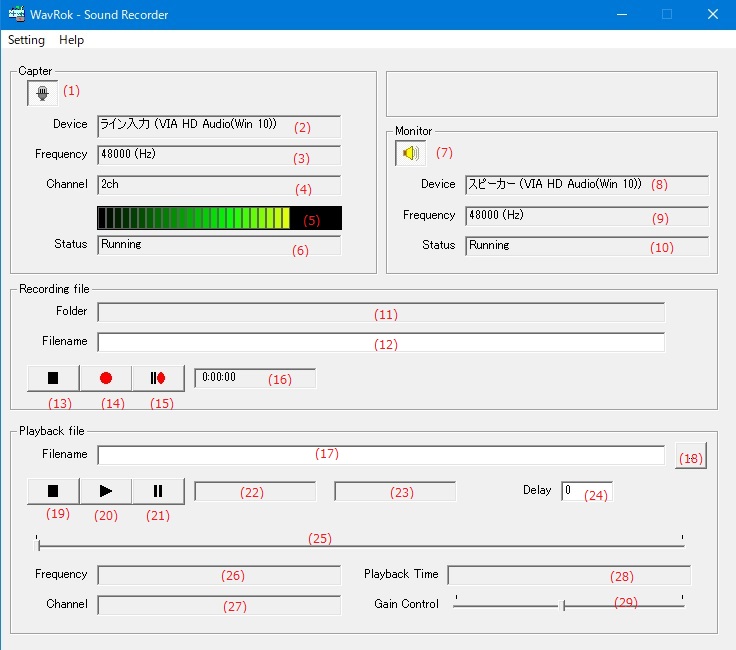
Capture
| (1) | [Capture]Button | Starts audio input from the audio input device. |
| (2) | Device | Displays the device name of the audio input device. |
| (3) | Frequency | Displays the sampling frequency of the audio input device. |
| (4) | Channel | Displays the number of channels on the audio input device. |
| (5) | Input Level | Displays the input audio level from the current audio input device. |
| (6) | Status | Shows the status of the current audio input device. |
Monitor
| (7) | [Monitor]Button | Starts audio output from the audio output device. |
| (8) | Device | Displays the device name of the audio output device. |
| (9) | Frequency | Displays the sampling frequency of the audio output device. |
| (10) | Status | Displays the current status of the audio output device. |
Recording file
| (11) | Folder | Displays the folder name where the recorded WAV file is saved. |
| (12) | Filename | Specify the name of the WAV file to record. |
| (13) | [Stop]Button | Stop recording. |
| (14) | [Start]Button |
Start recording. Or resume the paused recording. If the WAV file to be recorded cannot be created, recording will not be performed. There are the following cases where the file cannot be created. - The file name contains characters that cannot be used (\ /: *? "<> |). - The folder specified as the save destination for the WAV file to be recorded does not exist. * In the case of loopback recording, recording from a sound source protected by DRM etc. is not possible. |
| (15) | [Pause]Button | Pauses recording. |
| (16) | Recording time | Displays the recording time of the audio recorded in the file. |
Playback file
| (17) | Filename | Specify the file name of the WAV file or MP3 file to be played. |
| (18) | [File Select]Button | Select the file to play from the existing files. |
| (19) | [Stop]Button | Stops file playback. |
| (20) | [Start]Button |
File playback will start. Or resumes the paused playback. If the sampling frequency of the file to be played at the start of playback does not match the sampling frequency of the input / output device, file playback will not start. |
| (21) | [Pause]Button | Pauses file playback. |
| (22) | Playback time | Shows the playback time of the audio file. |
| (23) | Playback waiting time | Displays the time from when the [Start] button is pressed until the file playback starts. |
| (24) | Delay | Specify the waiting time in seconds from when the [Start] button is pressed until the file playback starts. |
| (25) | Play seek bar |
You can set the file position to start playback. The file position to start playback is displayed in "Playback time". |
| (26) | Frequency | Shows the sampling frequency of the audio file to play. |
| (27) | Channel | Shows the number of channels in the audio file to play. |
| (28) | Playback time | Displays the total playback time of the audio to be played. |
| (29) | Gain Control |
Adjusts the volume of the audio to be played. Move the bar to the left to reduce the volume. Move the bar to the right to increase the volume. |
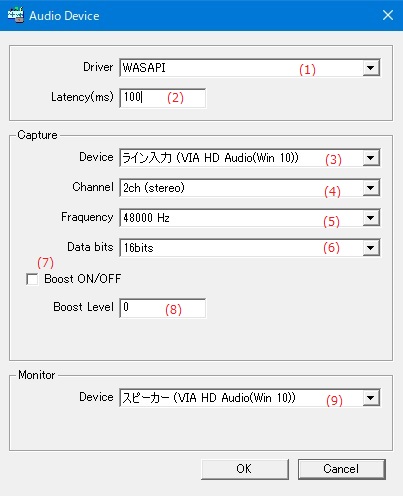
Driver Setting
| (1) | Driver |
|
||||
| (2) | Latency |
Specifies the delay time until the audio data input from the capture is output from the speaker. When recording while playing, the shorter the latency, the less stress you will feel, so set it to about 10ms. For normal recording, set it to about 100 to 200 ms. If the driver setting is MME, the latency setting is invalid. |
Capture
| (3) | Device |
Specifies the input device to capture. Select "......... (Loopback)" to perform loopback recording from the speaker. |
||||||||
| (4) | Channel |
|
||||||||
| (5) | Frequency | Specifies the sampling frequency of the audio data to capture. | ||||||||
| (6) | Data bits | Specifies the number of bits of audio data to capture. | ||||||||
| (7) | Boost ON/OFF | Increases the gain of the audio data to be captured. | ||||||||
| (8) | Boost Level | Specifies the gain factor when mic boost is enabled. |
Monitor
| (9) | Device | Specify the device name for audio output. |
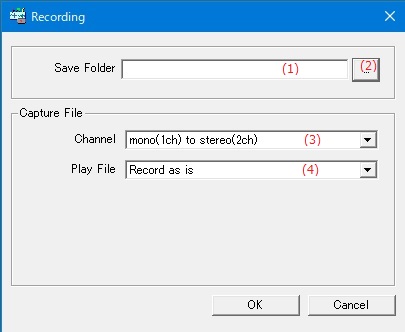
Folder
| (1) | Save Folder | Specify the folder name to save the WAV file to be recorded. |
| (2) | [Folder selection]Button | Displays the selection dialog when selecting the save destination folder from the existing folder. |
Capture file
| (3) | Channel |
Specifies the number of channels in the audio file to record.
|
||||||||
| (4) | Play File |
Specifies how to record the sound source of the file to be played as accompaniment.
|
Set the display language of the application.
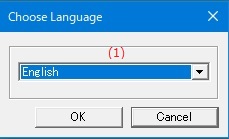
| (1) | Choose Language |
Select the display language of the application from the following languages.
|
Enter the application license key.
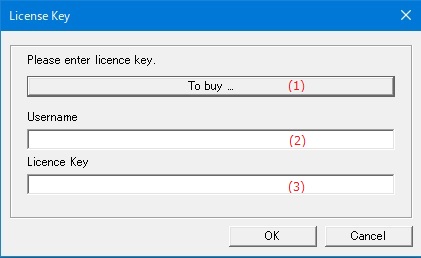
| (1) | "To Buy ..." button/td> | Displays the homepage where you can purchase the license key. |
| (2) | Username | Enter the user name to register the license. |
| (3) | Licence key | Enter the license key you purchased. |