Online help (DHCPOpt)
The archive file is compressed in zip format.
Please make a suitable folder, and place all files in the folder you created with the same folder structure.
File organization
| dhcpopt.exe | "DHCPOpt" Application file. |
Please delete each folder where the application exists.
File
| Load DHCP Setting File |
Load the contents of the file saved in the [Save DHCP Setting File] menu. |
|---|---|
| Save DHCP Setting File |
Save the DHCP option, IP address range of lease, and access restriction settings. |
| Setting | Make application settings for the application. |
| Exit | Exit the application. |
Help
| Help Topics | Open the online help page. |
|---|---|
| Choose Language |
Select the display language of the application as "English" or "Japanese". |
| About DHCPOpt ... |
Displays application version information. 
|
| To Keep Using ... |
Enter the license key. |
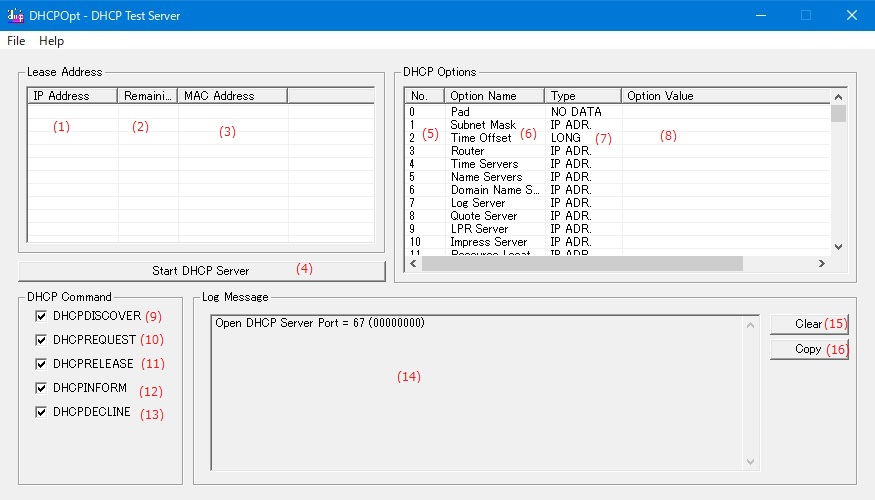
Lease Address
| (1) | IP Address | Displays the IP address currently leased to the DHCP client. |
| (2) | Remaing Time | Displays the remaining lease time of the currently leased address. |
| (3) | MAC Address | Displays the MAC address of the DHCP client that currently lease the IP address. |
| (4) | [Start DHCP Server] button |
DHCP server is started. |
| (4) | [Stop DHCP Server] button |
DHCP server is stoped. |
DHCP Option
| (5) | No. |
Displays the option number in the DHCP option parameter list. |
| (6) | Option Name | Displays the option name in the DHCP option parameter list. |
| (7) | Type |
DHCP Options Displays the DHCP option data type in the parameter list. |
| (8) | Option Value | DHCP option Displays the character string set for the DHCP option in the parameter list. |
DHCPv6 Option
| (9) | No. |
Displays the option number in the DHCPv6 option parameter list. |
| (10) | Option Name | Displays the option name in the DHCPv6 option parameter list. |
| (11) | Type |
DHCPv6 Options Displays the DHCPv6 option data type in the parameter list. |
| (12) | Option Value | DHCPv6 option Displays the character string set for the DHCPv6 option in the parameter list. |
DHCP Command
| (13) | DHCPDISCOVER |
Sets whether to handle the DHCPDISCOVER command from DCHP clients. |
| (14) | DHCPREQUEST |
Sets whether to handle the DHCPREQUEST command from DCHP clients. |
| (15) | DHCPRELEASE |
Sets whether to handle the DHCPRELEASE command from DCHP clients. |
| (16) | DHCPINFORM |
Sets whether to handle the DHCPINFORM command from DCHP clients. |
| (17) | DHCPDECLINE |
Sets whether to handle the DHCPDECLINE command from DCHP clients. |
DHCPv6 Command
| (18) | SOLICIT |
Sets whether to handle the SOLICIT command from DCHPv6 clients. |
| (19) | REQUEST |
Sets whether to handle the REQUEST command from DCHPv6 clients. |
| (20) | CONFIRM |
Sets whether to handle the CONFIRM command from DCHPv6 clients. |
| (21) | RENEW |
Sets whether to handle the RENEW command from DCHPv6 clients. |
| (22) | REBIND |
Sets whether to handle the REBIND command from DCHPv6 clients. |
| (23) | RELEASE |
Sets whether to handle the RELEASE command from DCHPv6 clients. |
| (24) | DECLINE |
Sets whether to handle the DECLINE command from DCHPv6 clients. |
| (25) | INFORMATION |
Sets whether to handle the INFORMATION command from DCHPv6 clients. |
Log Message
| (26) | Log display | Displays the communication log of the DHCP/DHCPv6 server. |
| (27) | [Clear] button | Clears the contents displayed in the log. |
| (28) | [Copy] button | Copy the contents displayed in the log to the clipboard. |
Set the value of the option variable corresponding to the DHCP option number.
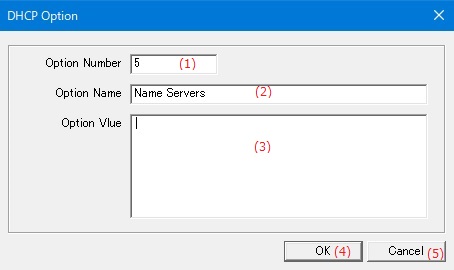
| (1) | Option Number | Set the option number for DHCP/DHCPv6 options. |
||||||||||||||||||||
| (2) | Option Name | Edit the option name of the DHCP/DHCPv6 option. |
||||||||||||||||||||
| (3) | Data Type |
Select the data type of the DHCP/DHCPv6 option from the following items.
|
||||||||||||||||||||
| (4) | Option Value | Edit the string to be set in the DHCP option. |
||||||||||||||||||||
| (5) | [OK] button | The settings made in this dialog will be reflected in the DHCP option list. |
||||||||||||||||||||
| (6) | [Cancel] button | The contents set in this dialog are discarded. |
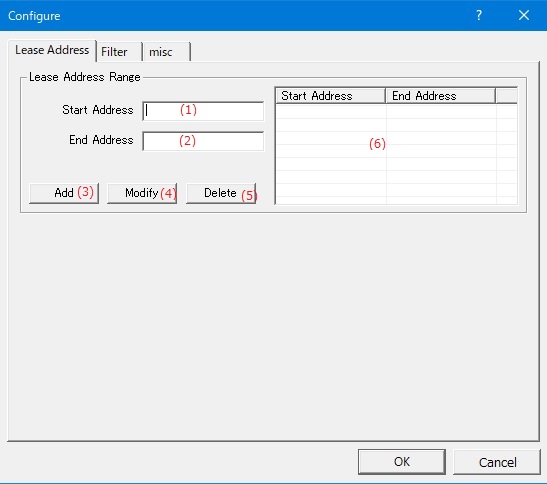
Lease Address Range
| (1) | Start Address | Set the starting address of the IP address to be lent to the DHCP client. |
| (2) | End Address | Set the end address of the IP address to be lent to the DHCP client. |
| (3) | [Add] button | Add a new address range to the lease address range list. |
| (4) | [Modify] button | Change the start address and end address of the address range where the cursor is in the lease address range list. |
| (5) | [Delete] button | Deletes the address range with the cursor in the lease address range list from the list. |
| (6) | List of Lease Address Range | Lists the set lease address range. |
DHCPv6
| (7) | DHCPv6 Type | Select the type of address that the DHCPv8 server will lease. |
| (8) | Lease Time | Set the lease time for the IP address lent to the DHCPv6 client. |
| (9) | Prefix | Set the prefix to be leased by the DHCPv6 server in IPv6 format. |
| (10) | Number of bits in the prefix | DSet the number of valid bits for the prefix leased by the DHCPv6 server. |
| (11) | Start Address | Set the starting address of the IP address to be lent to the DHCPv6 client. |
| (12) | End Address | Set the end address of the IP address to be lent to the DHCPv6 client. |
| (13) | [Add] button | Add a new address range to the lease address range list. |
| (14) | [Modify] button | Change the start address and end address of the address range where the cursor is in the lease address range list. |
| (15) | [Delete] button | Deletes the address range with the cursor in the lease address range list from the list. |
| (16) | List of Lease Address Range | Lists the set lease address range. |
Allows you to select DHCP clients that communicate with the DHCP server by MAC address.
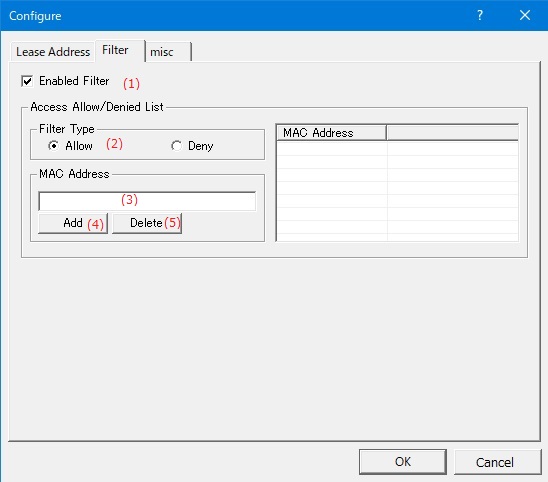
Allow or deny access list
| (1) | Enabled Filter |
If checked, the DHCP client connection will be restricted by the MAC address. |
| (2) | Filter Type |
Set whether to allow or deny the connection with the DHCP client in the MAC address list. |
| (3) | MAC Address | MAC address list Enter the MAC address to add. |
| (4) | [Add] button | Add a new MAC address to the MAC address list. |
| (5) | [Delete] button | Deletes the MAC address with the cursor in the MAC address list from the list. |
Set the options to be added by default even if not specified by the DHCP client.
| (1) | Always add options |
If checked, the option will be added by default. |
List of DHCP options to always add
| (2) | Option number | Select the option number you want to add. |
| (3) | [Add] button | Adds the selected option number to the option list. |
| (4) | [Delete] button | Deletes the selected option number from the option list. |
| (5) | List of DHCP ptions | A list of DHCP option numbers to add by default. |
List of DHCPv6 options to always add
| (6) | Option number | Select the option number you want to add. |
| (7) | [Add] button | Adds the selected option number to the option list. |
| (8) | [Delete] button | Deletes the selected option number from the option list. |
| (9) | List of DHCPv6 ptions | A list of DHCPv6 option numbers to add by default. |
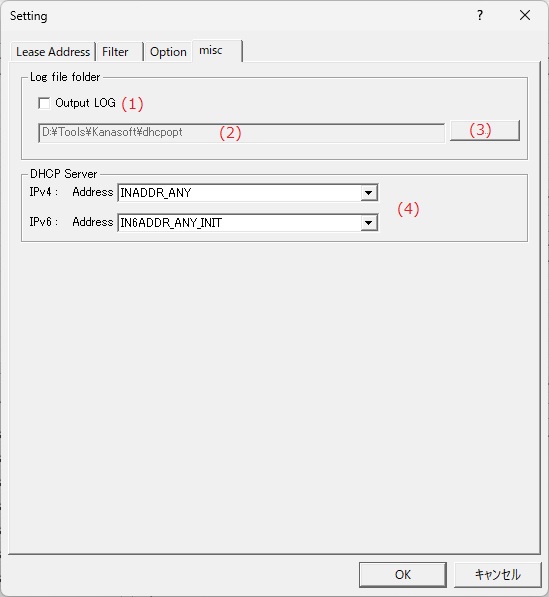
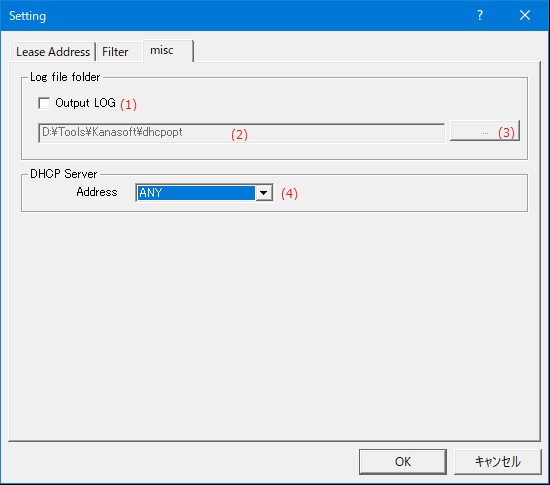
Log file folder
| (1) | Output LOG |
If checked, a log file will be created and the log will be output to a file.
|
||||||||||||
| (2) | Log file storage folder name | Set the name of the folder where the log file is stored. |
||||||||||||
| (3) | [...] button | Select the name of the folder where the log file is stored from the existing folders. |
||||||||||||
| (4) | DHCP Server address |
Select the IP address of the DHCP server. |
Set the display language of the application.
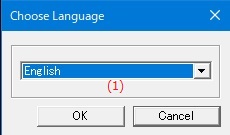
| (1) | Choose Language |
Select the display language of the application from the following languages.
|
Enter the application license key.
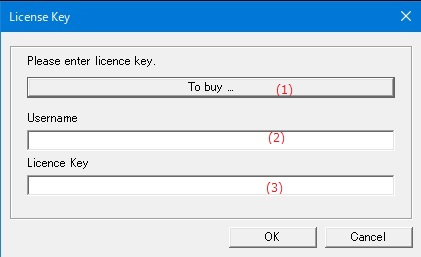
| (1) | [To Buy ...] button/td> | Displays the homepage where you can purchase the license key. |
| (2) | Username | Enter the user name to register the license. |
| (3) | Licence key | Enter the license key you purchased. |