Online help (HTTP POSTer)
The archive file is compressed in zip format.
Please make a suitable folder, and place all files in the folder you created with the same folder structure.
File organization
| HttpPoster.exe | "HTTP POSTer" Application file. |
| HttpPoster.exe.config | Setting file. |
| ja-JP/HttpPoster.resources.dll | Japanese resource file. |
Please delete each folder where the application exists.
File
| Load HTTP Request File | Reads the HTTP request configuration file used in the repeat request. |
|---|---|
| New | Create a new HTTP request configuration file to be used in repeated requests. |
| Edit HTTP Request File | Edit the HTTP request configuration file used in the repeat request. |
| Setting | Make various settings for the application. |
| Exit | Exit the application. |
Help
| Help Topics | Open the online help page. |
|---|---|
| Choose Language |
Select the display language of the application as "English" or "Japanese". |
| About HTTP POSTer ... |
Displays application version information. 
|
| To Keep Using ... |
Enter the license key. |
One-shot request

HTTP Request
| (1) | URL | Enter the URL of the HTTP server that sends the HTTP request message. |
||||||||
| (2) | Method |
Select the HTTP request method from the following.
|
||||||||
| (3) | [Send] button | Send an HTTP request. |
||||||||
| (4) | [Cancel] button | Aborts a running HTTP request. |
||||||||
| (5) | Query list | Starts running the resident scenario. |
||||||||
| (6) | [New] button | Add a new query string to the query list. |
||||||||
| (7) | [Edit] button | Edit the query string in the query list. |
||||||||
| (8) | [Delete] button | Deletes the query string in the query list. |
||||||||
| (9) | Content-Type |
Select the data type of Content to be added to the body part of the HTTP request from the following items.
|
||||||||
| (10) | Authentication | Opens a dialog to set the user name and password required to authenticate the HTTP request. |
||||||||
| (11) | All Clear | Clears all input items of HTTP request. |
||||||||
| (12) | Content | The message body of the HTTP request. |
HTTP Response
| (13) | Show log | |
| (14) | [Clear] button | Clears the contents of the displayed log. |
| (15) | [Copy] button | Copy the contents of the displayed log to the clipboard. |
Repeat request
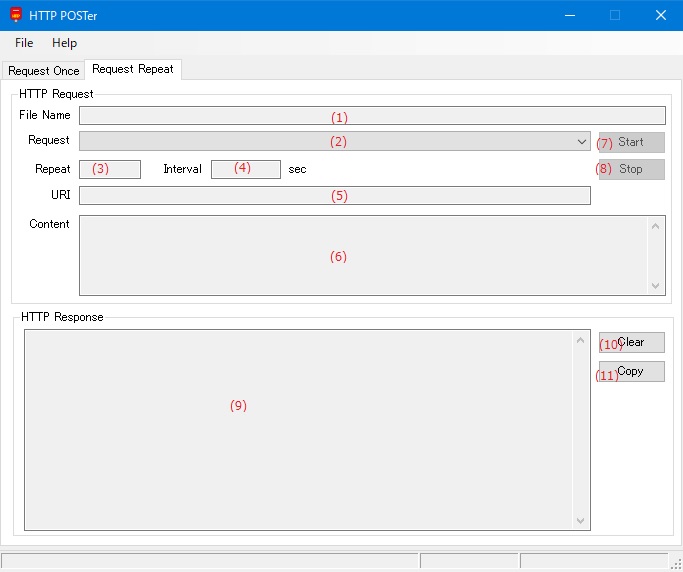
HTTP Request
| (1) | File Name | Displays the HTTP request file name. |
| (2) | Request | Select the HTTP request to send repeatedly. |
| (3) | Repeat |
Displays the number of times to send repeatedly. |
| (4) | Interval | Shows the wait time before sending the next HTTP request. |
| (5) | URI | Then display the URI to send the HTTP request. |
| (6) | Content | The contents of the body part of the HTTP request to be sent next are displayed. |
| (7) | [Start] button | Starts repeated sending of HTTP requests. |
| (8) | [Stop] button | Suspends repeated sending of HTTP requests. |
HTTP Response
| (9) | HTTP Response list | Display the response data for the HTTP request. |
| (10) | [Clear] button | Deletes the contents displayed in the HTTP response list. |
| (11) | [Copy] button | Copy the contents displayed in the HTTP response list to the clipboard. |
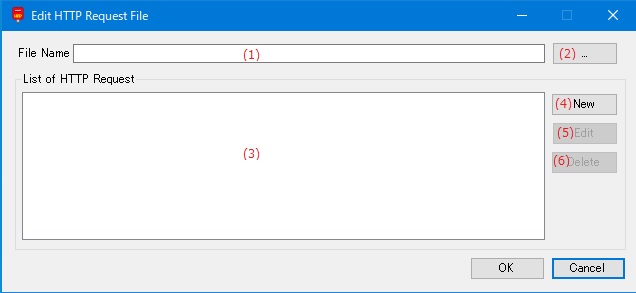
| (1) | File Name | Enter the file name of the HTTP request file. |
| (2) | [...] button | Select the filename of the HTTP request file from the existing filenames. |
| (3) | List of HTTP request | The created HTTP request settings are displayed in the list with the title attached to the HTTP request. |
| (4) | [New] button | Add the newly created HTTP request to the HTTP request list. |
| (5) | [Edit] button | Edit the settings of the request selected in the HTTP request list. |
| (6) | [Delete] button | Deletes the settings of the request selected in the HTTP request list. |
Edit HTTP request message

| (1) | Title | The title to give to this HTTP request message. Used when displaying in the list. |
URL
| (2) | URL | Enter the URL to which you want to send the HTTP request. |
||||
| (3) | Method |
Select the HTTP request method from the following items.
|
||||
| (4) | Interval | This is the transmission interval when sending HTTP requests repeatedly. |
||||
| (5) | Repeat | The number of times to send an HTTP request repeatedly. |
Query

| (6) | List of query | Lists the set of key names and values to use when the HTTP request method is GET or when Cotent-Type is specified as [application / x-www-form-urlencoded]. |
| (7) | [New] button | Add the newly created query settings to the list. |
| (8) | [Edit] button | Edit the settings of the query selected in the list. |
| (9) | [Delete] button | Deletes the query selected in the list. |
Body
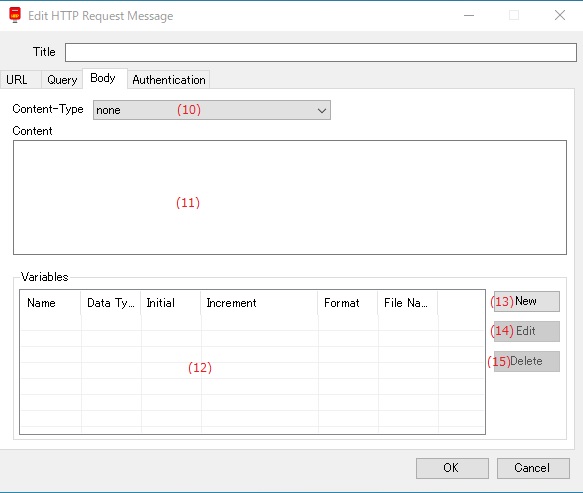
| (10) | Content-Type |
Select the data type of Content to be added to the body part of the HTTP request from the following items.
|
||||||||
| (11) | Message | Enter the Content message to be added to the body part of the HTTP request. |
||||||||
| (12) | List of variables. |
|
||||||||
| (13) | [New] button | Add the newly created embedded variable settings to the list. |
||||||||
| (14) | [Edit] button | Edit the settings of the embedded variable selected in the list. |
||||||||
| (15) | [Delete] button | Deletes the embedded variable setting selected in the list. |
Authentication
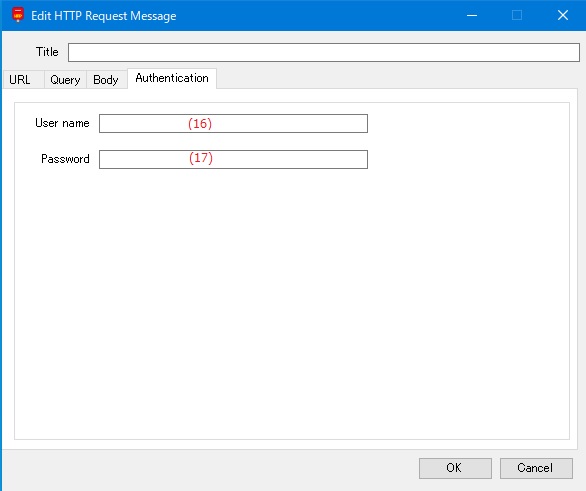
| (16) | User Name | The user name used in the URL that requires authentication. |
| (17) | Password | This password is used for URLs that require authentication. |
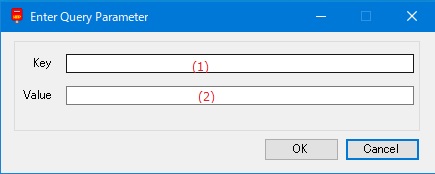
| (1) | Key | Enter the name for the query. |
| (2) | Value | Enter the value of the query. |
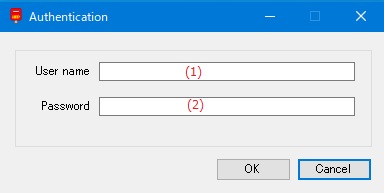
| (1) | User Name | The user name used in the URL that requires authentication. |
| (2) | Password | This password is used for URLs that require authentication. |
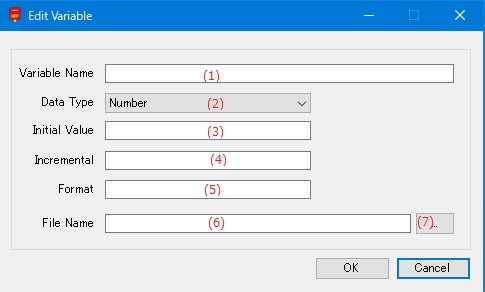
| (1) | Variable Name | Set the variable name of the embedded variable. |
||||||||||||
| (2) | Data Type |
Select the data type of the embedded variable from the following items.
|
||||||||||||
| (3) | Initial Value | Set the initial value of the embedded variable. |
||||||||||||
| (4) | Incremental |
Set the amount of one increase when executing a repetitive request. * If the data type is [String], the setting will be invalid. |
||||||||||||
| (5) | Format |
Specifies the format for embedding embedded variables in a message. If the data type is [Number], specify as follows. * The format is the same as the format that can be specified by the ToString () method of C #.
If the data type is [DateTime], specify as follows. * The format is the same as the format that can be specified by the ToString () method of C #. |
||||||||||||
| (6) | File Name |
When the data type is [String], enter the character string list file to change the variable for each request in the repeated request. |
||||||||||||
| (7) | [...] button | Select a string list file from an existing file name. |

Log file folder
| (1) | Output LOG |
If checked, a log file will be created and the log will be output to a file.
|
||||||||||||
| (2) | Log file storage folder name | Set the name of the folder where the log file is stored. |
||||||||||||
| (3) | [...] button | Select the name of the folder where the log file is stored from the existing folders. |
Set the display language of the application.
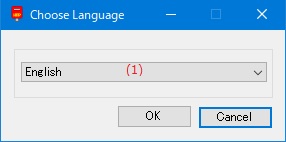
| (1) | Choose Language |
Select the display language of the application from the following languages.
|
Enter the application license key.
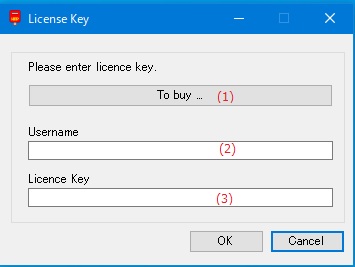
| (1) | [To Buy ...] button/td> | Displays the homepage where you can purchase the license key. |
| (2) | Username | Enter the user name to register the license. |
| (3) | Licence key | Enter the license key you purchased. |